Food
Recipe
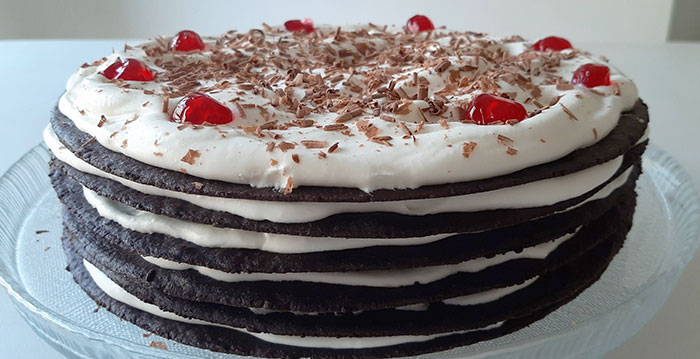
Black Forest Icebox Cake, a Retro Summertime Delight

Elegant summer desserts are hard to come by. Ice creams and sorbets melt easily in the warm weather, and heavy cakes are just that—heavy—once the temperature starts climbing. Icebox cakes to the rescue! They couple the “illusion” of cake with the satisfying, chilled richness that pudding, cold from the fridge, possesses.
This old-fashioned homey solution for a summery cake got its start back in the 1930s, at a time when food rations meant homemakers had to incorporate a little ingenuity into their baking. It was also the start of an era where the refrigerator was becoming a common appliance in American homes, creating a freedom to be more playful when it came to making perishable foods.
A cake made from lightly sweetened cream layered with tea crackers that soften over time as they sit in the fridge, icebox desserts were the ultimate solution for when sugar, butter and eggs were hard to come by.
 And as all things are cyclical, incredulously, scarcity baking is something we, in 2020, faced in the throes of coronavirus lockdowns over the last many months. Ingredients are scarce, make do with what you have was once again a reality.
While in the first half of the 20th century you’d have had very few cookbooks to rely on, or the arrival of a flyer or advertisement in the mail (many passed down family favorites are simply inserts from magazines or recipes printed on product labels), today there is no limit to the inspiration one can pull from myriad sources.
Instagram and Pinterest are filled with photos of the dreamiest icebox cakes you can imagine. Indeed, social media is a great starting place for inspiration when personal design creativity is hard to come by. And creative license means that, these days, it’s simply the norm to take a homey dessert like an ice box cake, which can be made in the most basic sense possible, and jazz it up to your liking.
But I solemnly swear to you, my readers: You should feel free to take this Black Forest Icebox Cake and adapt it to what you have available. Should you find yourself without the materials necessary to make your own chocolate wafer discs, by all means, grab a rectangular Pyrex dish and layer it up like lasagna with the tea biscuits in your pantry. You can’t mess this one up. And for that we can all thank the previous generations, who understood the humility that comes with the territory of unique circumstances, as we are all experiencing right now.
 Black Forest Icebox Cake
Makes 1 cake
EXTRA LARGE CHOCOLATE WAFER COOKIES
3 cups all-purpose flour
1 1/2 cups unsweetened cocoa powder
1/2 teaspoon instant espresso powder (optional)
1/2 teaspoon salt
1 1/2 cups butter
2 1/4 cups sugar
6 tablespoons milk
2 teaspoons vanilla extract
WHIPPED CREAM FILLING
1 1/2 cup canned or fresh pitted cherries, drained of any liquid
1/2 teaspoon almond extract
4 cups heavy cream
1/2 cup powdered sugar
6 tablespoons instant vanilla pudding (this stabilizes the whipped cream, allowing it to firm up)
1/4 teaspoon salt
1 tablespoon vanilla extract
Candied cherries for decoration
A few squares of baker’s chocolate for decorating
- Make the wafer cookies: Preheat oven to 350°. In a medium-sized bowl, sift together flour, cocoa powder, espresso powder and salt. Set aside.
- Cream together butter and sugar until fully incorporated. Add milk and vanilla and mix to combine. Add the mixture of dry ingredients to the butter and sugar, and mix until a cohesive dough forms.
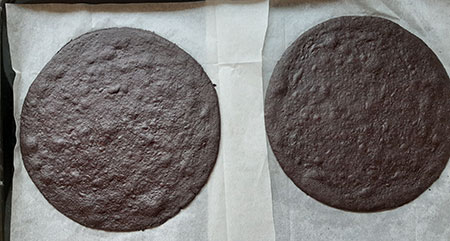
- Working with 1/4 of the dough at a time, roll the dough out as thin as possible on top of a piece of parchment paper. Using an upside-down round baking pan as your guide, trace a circle onto the rolled-out cookie dough with a butter knife (I used an 8-inch round cake pan). Carefully gather the excess cookie dough scraps into a ball and lift up the baking pan. Cut the parchment paper, leaving only an inch or so on all sides, and carefully transfer to a baking tray. Continue rolling out 5 more circles with the remaining dough.
- Bake each round for 8 to 10 minutes, or until the dough has lost its sheen and is completely baked. Let each cookie round cool completely. (Note: Any leftover cookie dough can be separated into rough chunks and baked in the oven for 12 to 15 minutes, then enjoyed as is, or ground into cookie crumbs to be used for cookie crusts or toppings for ice cream and cakes.)
- Pit, if necessary, and drain cherries of any liquid. Place 1 cup cherries in a small bowl and add almond extract. Stir to combine and set aside.
- Make the whipped cream filling: Place the cream in a mixer bowl along with the powdered sugar, instant pudding mix, salt and vanilla. Using the whisk attachment, whip into a stable yet spreadable whipped cream. Check for constancy by plunging the whisk into the whipped cream, pulling up and turning the whisk upside down over the bowl. The cream should keep its shape somewhat, while slowly falling down over the whisk. If it immediately slides back down into the bowl, continue whipping for 1 to 2 more minutes and check again.
- Once all cookie rounds have cooled completely you can assemble your cake. Gently peel the baking paper off each cookie round. Secure one round as the bottom layer by smearing 1 tablespoon of the whipped cream to a cake plate.
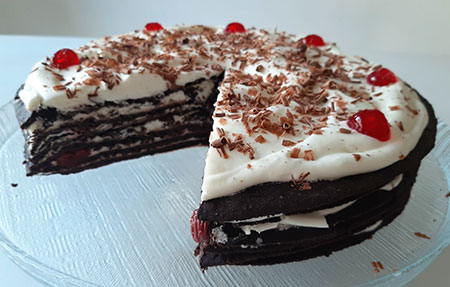
- Add approximately 1 cup of the whipped cream mixture and spread it evenly over the top of the cookie round, leaving a 1/2-inch border around the edge of the cookie. Top with 1/4 cup of the soaked cherries, then top with another cookie round. Repeat the process until you reach the final layer. Add 2 cups of cream to the top of the cake, decorate with candied cherries and use a vegetable peeler to grate chocolate over the top.
- Refrigerate cake for 24 hours to allow the cookie layers to soften. Cut with a knife that’s been dipped in hot water and dried.


 Facebook
 Instagram
 Twitter
Leave a Reply