Food
Recipe
You Say Sweet Potato, I Say Batata
Unless you live under a rock, you couldn’t possibly miss the recent worship of the previously humble pumpkin. Transforming at some point from a spooky Halloween lawn ornament—its seeds rinsed, toasted and salted for a once-a-year snack—it’s now infiltrated seemingly everything, from breakfast cereal to coffee to air fresheners. (How did that happen?) But I can wholeheartedly tell you that while the pumpkin may appear at first glance to embody the quintessential autumn bounty, sweet potato—batata as Israelis refer to it—is in fact sweeter and smoother, indeed deserving fame and attention in the kitchen.

Think back to the days before Libby’s pumpkin purée in a can. Which striking orange veggie do you think made for a better purée, and therefore carried over better in cooking and baked goods? Make an Israeli “orange soup” using pumpkin or carrots versus sweet potato, and you will discover what most Israelis already know—that batata emerges the clear winner. Carrots have a bitter bite that must be tempered by something sweet, plus they take a long time to soften. Meanwhile, pumpkin can be a bit gamey and get waterlogged and stringy in texture.
Sweet potatoes are smooth, rich and naturally sweet. And because they are lower in water content, they are ideal for Thanksgiving classics like sweet potato pie (or pie bars), sweet potato dinner rolls and sweet potato cake.
Are you getting the picture? If only to counter the pumpkin spice army, or if baking with canned ingredients rubs you the wrong way and you’d like to go in a different direction, consider switching to the batata this fall. (Check out my article on using a batata as the base for salad-bar toppings here.)
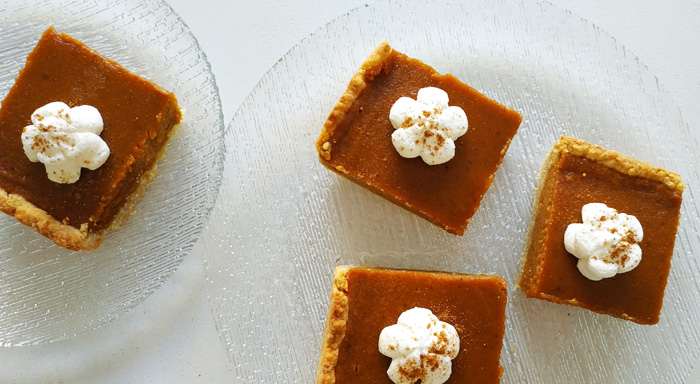
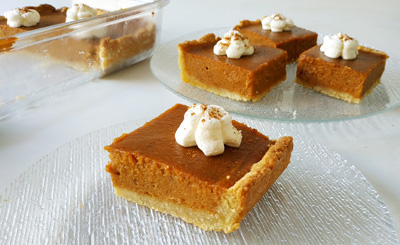
Now, in time for Thanksgiving, I’m sharing the recipe for my sweet potato pie bars. They are made by roasting sweet potatoes until ultra-soft, them mashing and straining them into a smooth purée that becomes the base of the most luscious fall pie you can imagine. A buttery, flaky crust anchors the sweet potato mash, and homemade cool whip gives the bars a creamy finish. Making rectangular pie bars as opposed to a round pie means you can enjoy a higher ratio of silky spiced filling to crust—plus guests can pick up the pieces and eat them by hand, making it ideal for parties or large gatherings.
While good the first day they come out of the oven, bars will be even more flavorful the following day, something that is true with any well-spiced dessert and most chilled, custard-like sweets.
 Sweet Potato Pie Bars
Makes 12 bars
BATATA MASH
4 large sweet potatoes (you will need 3 cups purée after it is baked, mashed and strained)
1/3 cup whipping cream
1/2 cup brown sugar
1/2 cup white sugar
Large pinch salt
1 1/2 teaspoons ground cinnamon
1/8 teaspoon ground nutmeg
1/8 teaspoon ground cloves
1 tablespoon maple syrup
4 large eggs
2 tablespoons flour
PIE CRUST
1 cup cold butter (or margarine if making pareve)
2 1/2 cups + 2 tablespoons all-purpose flour
1/4 cup sugar
1/2 teaspoon salt
1/2 cup cold milk (or soy milk if making pareve), plus more if needed
1 tablespoon white vinegar
1 teaspoon vanilla extract
HOMEMADE COOL WHIP
1 1/2 cups whipping cream
3 tablespoons instant vanilla pudding mix
1/4 cup powdered sugar
- Make the sweet potato purée: Wash sweet potatoes and cut in half lengthwise. Place them flesh side down on a parchment paper-lined baking sheet and roast for 1 to 1 1/4 hours, or until very tender. Let cool, then peel the sweet potatoes with your fingers, or scoop out flesh into a large bowl. Mash the sweet potatoes into a purée, then push through a fine mesh strainer over a clean bowl using a silicon spatula. Discard anything left in the strainer, and set the purée aside.
- Make the pie crust: Cut butter into medium-size chunks. In a medium-size bowl, whisk together flour, sugar and salt. Add the butter and gently work it into the flour mixture until you are left with scrambled egg-size chunks of butter.
- Add the cold milk, vinegar and vanilla extract to the chunks of butter, and fold the mixture together with a silicone spatula.
- Once the dough is mostly combined with a few unincorporated crumbs, turn it out onto a clean work surface and gently knead just until the dough comes together. Form into a disc, cover in plastic wrap and let it rest in the refrigerator for 1 to 2 hours.
- Once chilled, remove the dough from the refrigerator and let rest on the counter for a few minutes.
- Roll out the dough to a 1/4-inch thick rectangle, fold dough in half and transport to a 9×13-inch baking dish. Open up the dough and press it evenly down into the dish, along the bottom and up the sides.
- Transfer the dish to the freezer to chill for 1 hour before baking. After 40 minutes, preheat oven to 350°. Just before baking, remove dish from the freezer and poke holes all along the bottom of the dough with a fork. Bake for 15 to 20 minutes or until lightly golden. If the dough has shrunk down it can be gently pushed back up using your fingers once it has slightly cooled, but is still warm and pliable.
- While the base is baking, make the filling: Combine all the ingredients except the eggs and flour, and stir to combine. Taste and adjust seasoning if necessary.
- Add the eggs and flour and mix to combine. Pour into the par-cooked pie crust and bake for 35 to 40 minutes, or until the center is completely set.
- Let cool completely, then chill in the fridge for 2 to 4 hours before serving. Cut into 12 bars.
- Make the cool whip: In the bowl of a stand mixer or using a hand mixer, beat together whipping cream, vanilla pudding mix and powdered sugar until stiff peaks form. Pipe or spoon the cool whip onto the top of each pie slice before serving. Store any unused cool whip in an airtight container in the fridge for up to a week.


 Facebook
 Instagram
 Twitter
Phyllis C says
My son is gluten-free. I just purchased a package of gluten free pie shells. I will prepare it with the Batata Mash using 2 tablespoons of gluten free flour. I think it will be delicious.